

How To Make A Unicorn Balloon Animal
Craftwork How To's
How to Make a Balloon Animal Stuffy
- By Alyssa
- 45 minutes
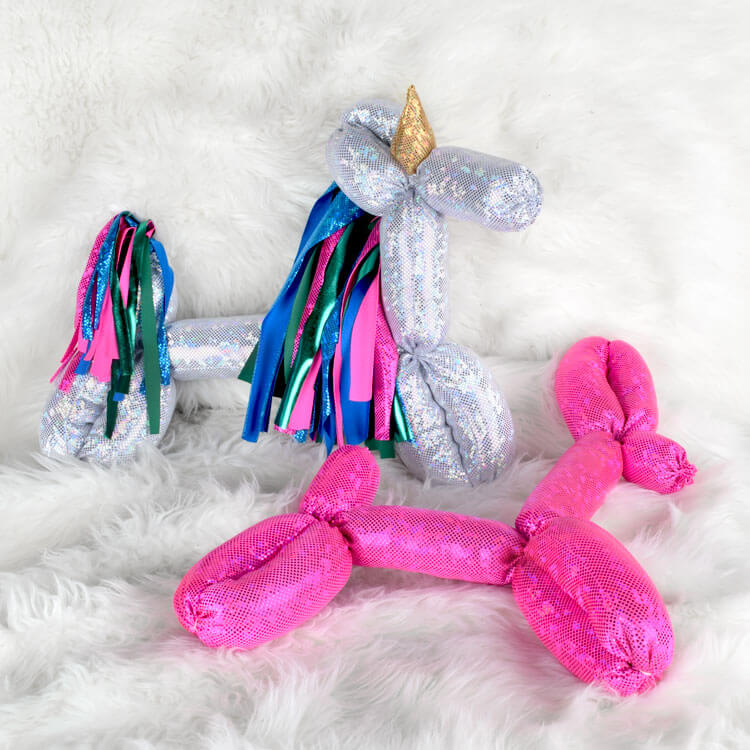
After a fun night at the arcade, I came home with a very cool night light that was plastic but was in the shape of a balloon animal and as I sat looking at him in all his cuteness I thought – what if I made a balloon animal that was actually a stuffed animal. These guys are not only a great gift for birthdays, baby showers, or holidays but also are super fun to make and loved by adults and children alike.
In this tutorial I will show you how to make a dog but if you want to make any other animals, there are tons of videos online about making balloon animals, just use the same tie method every time they twist the balloon, we found a tutorial for an elephant, dinosaur, and added a unicorn horn to a dog for this cute little guy. Whatever you try, send us a picture to media@onlinefabricstore.net. We love seeing your projects!
Materials
- Spandex Fabric
- Polyester Stuffing
- A Ruler
- Scissors
- Hand Sewing Needle
- Fabric Maker or Chalk
- Pins or Clips
- Coordinating Thread and Upholstery Thread
- A Dritz Loop Turner
- An Empty Wrapping Paper Roll
- A Sewing Machine

Video
Instructions
STEP 1: Cut fabric
Cut a strip of fabric that is 5 x 50" for each stuffed animal.

STEP 2: Clip and sew
Fold the fabric in half lengthwise and clip the edges with right sides together. Sew up the edge with a quarter inch seam allowance.

STEP 3: Flip right side out
Using the Dritz loop turner, flip the tube you just made right side out. Hand sew an eighth of an inch from one edge with a running stitch and pull it snug to create a look like the knot at the end of a balloon.

STEP 4: Stuff
Stick the wrapping paper roll into the tube and start stuffing the pillow.

STEP 5: Sew the other end
Sew the other end shut with the same running stitch as the other end.

STEP 6: Make your animal
Now it's time to make your animal! To make a dog, tie of one section that is two inches long and then 5 sections that are 3 inches long. One section that is 4 inches. And then another two sections that are each three inches long. The final section will be the tail and should be only a few inches long.

To tie off the sections, separate the stuffing inside the roll by pinching it in between your fingers and rolling. Then double over a piece of thread and string the ends through the loop around the roll. Pull it tight and make two knots on the opposite side of the loop to secure the section. The tighter you can get this step the better it will look. Trim the ends of the thread down so that they're hard to see.

To fold the dog, pinch the second and third sections together and tie it so it creates the nose and ears of your stuffed animal.

Then, pinch and tie the fifth and sixth sections to create the front legs.

Lastly, pinch and tie the eight and ninth sections to create the back legs and tail.

Shop Spandex Here!
Questions & Comments
Have a comment? We want to hear! You can use the questions box to leave a comment too.
How To Make A Unicorn Balloon Animal
Source: https://www.onlinefabricstore.com/makersmill/how-to-make-a-balloon-animal-stuffy/
Posted by: schultetram1959.blogspot.com
0 Response to "How To Make A Unicorn Balloon Animal"
Post a Comment